# Engineering Design Process
**Engineering Design Process**
1. Define the problem
2. Do background research
3. Specify requirements
4. Brainstorm, Evaluate, and choose solution
5. Develop and prototype solution
6. Solution either partly or fully meets requirements (testing)
7. Communicate results
[](https://wiki.piflyer.net/uploads/images/gallery/2025-11/untitled-design-3-600x600.webp)
**Defining the Problem/challenge**
Building a rover that takes temperature and humidity readings, can avoid obstacles, detects carbon monoxide, and more. It can be used by firefighters, scientists, anybody who wants to be sure an area is safe.
**Do Background Research**
Robot can be used to fight fires or just explore a cavern, like a mini mars rover. Mars rovers do almost the same thing as my rover: temperature readings, rock and soil samples, and pictures. With more developments, it could become a rover, checking if somewhere is suitable for human life. In this way, it is a lot like a Mars rover.
Rover picture: Base rover project:
[](https://wiki.piflyer.net/uploads/images/gallery/2025-11/mars-rover-sulfur-hero-940x529.jpg)[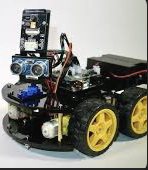](https://wiki.piflyer.net/uploads/images/gallery/2025-11/screenshot-2025-11-21-16-51-03.png)
**Specify Requirements**
Carbon monoxide detector temperature and humidity sensor, mounted with the Arduino and breadboard, and jumper wires on top of the robots. The LCD will display the temperature and humidity readings. The Arduino will control and power the sensors. Another rechargeable battery powers the screen.
**Brainstorm, Evaluate, and Choose Solution**
Using the Elegoo robot as a base, adding cool sensors and a screen to the top to complete the requirements.
\#include <DHTStable.h>
\#define DHT11\_PIN 7
DHTStable dht;
void setup() {
Serial.begin(9600);
}
void loop() {
int chk = dht.read11(DHT11\_PIN);
Serial.print("Status: ");
Serial.println(chk);
Serial.print("Temp: ");
Serial.println(dht.getTemperature());
Serial.print("Humidity: ");
Serial.println(dht.getHumidity());
delay(1000);
}
This is the code for the dht sensor, also a test code.
**Develop and Prototype Solution**
Add a photoresistor module to detect light, program it to light an LED if there is light and red LED if no light. Another Battery, no Pi, only Arduino.